
How To Build 2 Different Types Of Homemade Air Conditioning Units
 Option 1 Option 1 Coleman Cooler Air Conditioner Unit A bit more effort & time to assemble, but worth it for any do-it-yourself fanatic! Plus, this unit will dish out more cool air per sq ft. | 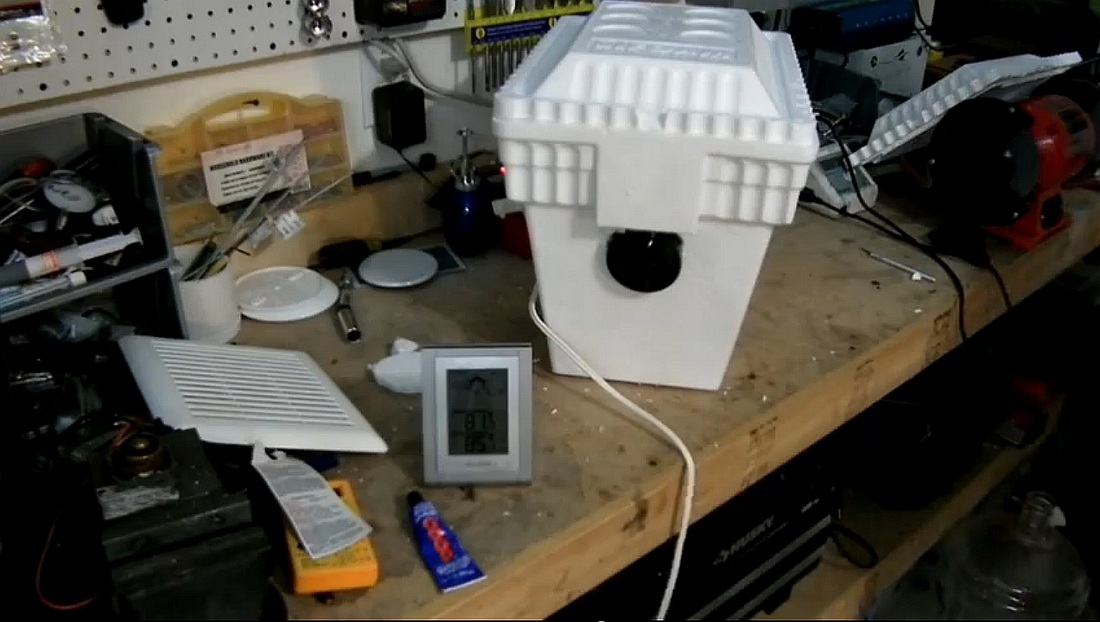 Option 2 Option 2 Styrofaom Air Conditioning Unit This extremely inexpensive air cooling contrapment can be assembled in less than 10mins from start to finish! All of the materials can be purchased at Home Depot for less than $20. Just add ice! ...well, frozen water bottles or ice packs. |
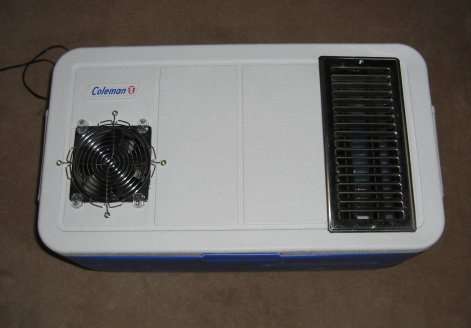
(Option #1) Coleman Cooler Air Conditioner Unit
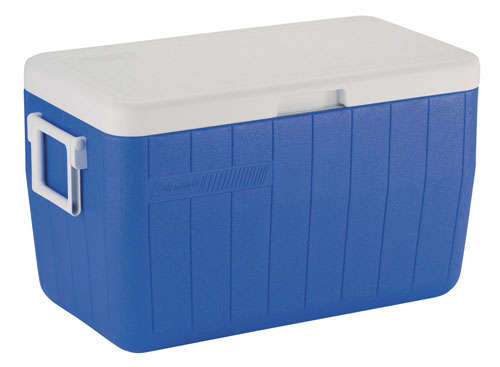
Step 1 Supplies - The Cooler
This blue beauty has a 45.5 L (48 qt) capacity and can hold 63 cans plus 7.7 kg (17 lb) of ice (That's before you turn it into a major air cooling Frankenstein). Its lid is hinged, and has "easy to lift" 2-way handles, and a rust-proof / leak-resistant drain.
This blue beauty has a 45.5 L (48 qt) capacity and can hold 63 cans plus 7.7 kg (17 lb) of ice (That's before you turn it into a major air cooling Frankenstein). Its lid is hinged, and has "easy to lift" 2-way handles, and a rust-proof / leak-resistant drain.
Step 2 Supplies - Used Computer Fan
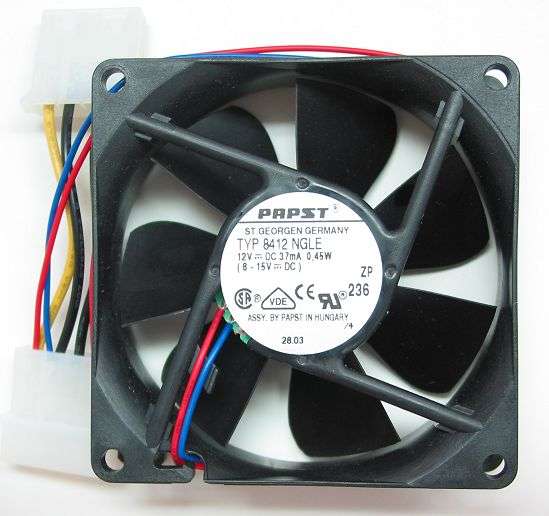
Get yourself an old used computer fan from an old computer... for intake of warm air, and to circulate the air inside the unit.
The fan used in the pictures below is slightly larger, but this is the basic concept.
Get yourself an old used computer fan from an old computer... for intake of warm air, and to circulate the air inside the unit.
The fan used in the pictures below is slightly larger, but this is the basic concept.
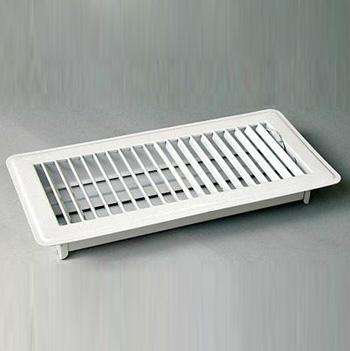
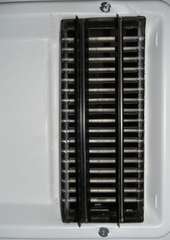
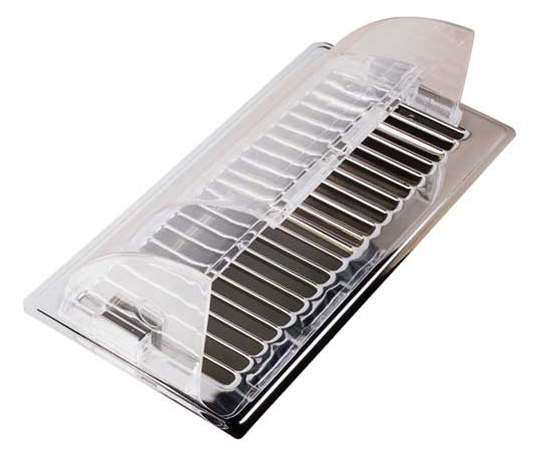
Step 3 Supplies - The Floor Vent
Use this as the vent for the exhaust of the cool air.
The extra added feature of this is that it's somewhat manually directional allowing you to tweak and turn the attached knob/lever.
Use this as the vent for the exhaust of the cool air.
The extra added feature of this is that it's somewhat manually directional allowing you to tweak and turn the attached knob/lever.

Get fancy with it if you want! These vents come in many different colors. Customize your Homemade Air Cooling Unit till your heart's content!

Step 4 Preparing The Lid
Trace around the computer fan on one side of the lid, (the left side shown in this pic) and cut out the square.
Trace around the inner dimensions of the Floor vent on the other side of the lid (the right side as shown in this pic.)
Test fit both pieces, and trim if you need to until you get a nice tight fit.

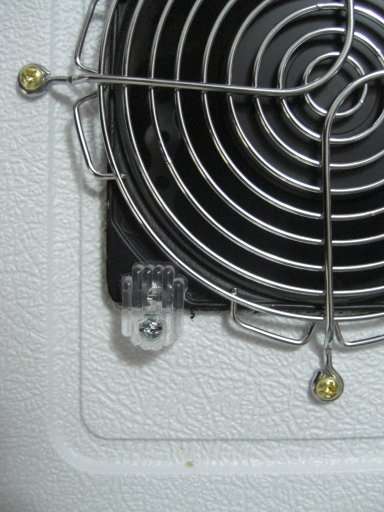
Step 5 Secure The Fan
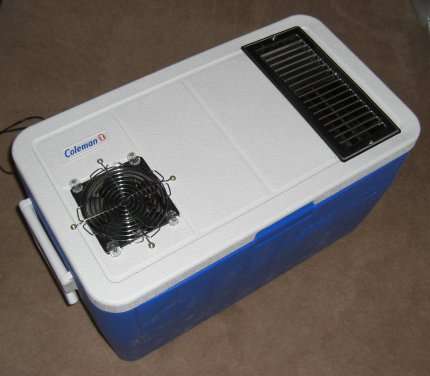
Secure the fan from the top into the lid.
I originally used the clear plastic mirror mounts to hold the fan in place from the top, but then remembered that some people have pets and children who like to put body parts into interesting slots, holes and/or places that they really shouldn't so I ended up screwing on the safety grill as an added step...protection.
Coleman logo shown with added colour details!
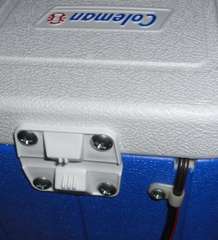
Step 6 Secure Some More
Secure the floor vent to the lid of your cooler with screws or bolts, whatever you like!
Secure the floor vent to the lid of your cooler with screws or bolts, whatever you like!
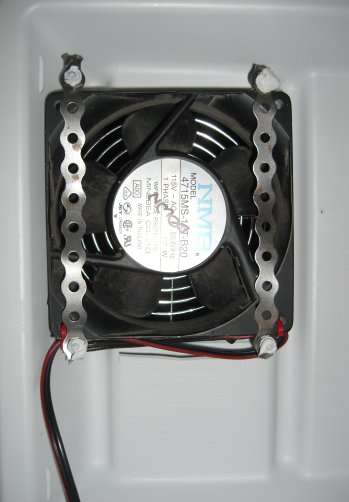
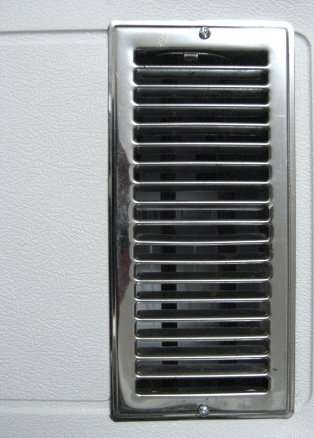
Step 7 Secure it Under The Lid
On the inside, underneath the lid of the cooler, I bolted my computer fan in firmly tight with some metal strapping. Now that it's completely secured from the top and underside of the lid, it won't slide upwards, fall into the cooler, or rattle and vibrate and drive you crazy!
*NOTE - Underside of floor register also shown for those out there who want to see the underside of a floor register.
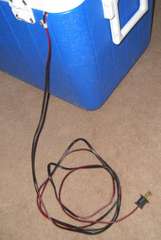
I also ran the power chord for the fan out the back of the cooler by one of the hinges (secured that as well) and gave myself enough cable in order to move the unit around the room to whatever location you wish to make... cooler!
On the inside, underneath the lid of the cooler, I bolted my computer fan in firmly tight with some metal strapping. Now that it's completely secured from the top and underside of the lid, it won't slide upwards, fall into the cooler, or rattle and vibrate and drive you crazy!
*NOTE - Underside of floor register also shown for those out there who want to see the underside of a floor register.
I also ran the power chord for the fan out the back of the cooler by one of the hinges (secured that as well) and gave myself enough cable in order to move the unit around the room to whatever location you wish to make... cooler!
 |
|

Step 8 Now Let's Jump Inside
Inside the cooler, you want the air to be able to move around freely so the the cool air is blown out of the exhaust vent.
*NOTE - Warm and hot air rises and cool and cold air falls.
Inside the cooler, you want the air to be able to move around freely so the the cool air is blown out of the exhaust vent.
*NOTE - Warm and hot air rises and cool and cold air falls.
 |  |
Without the fan moving air around inside the cooler, the cool air will not escape through the exhaust vent.
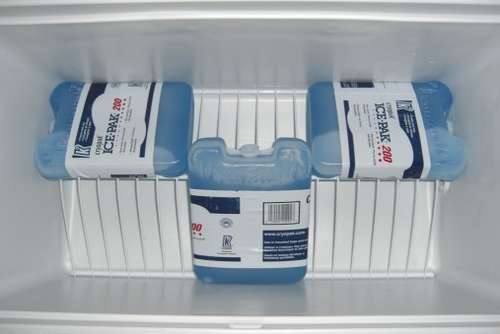
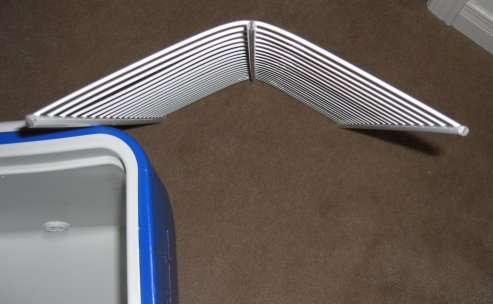
I took a piece of metal shelving and bent it into a "V" shape to fit into the bottom of the cooler... so that you can put re-freezable gel cooling packs into the bottom of the cooler, and air can still circulate around and underneath the packs.
I took a piece of metal shelving and bent it into a "V" shape to fit into the bottom of the cooler... so that you can put re-freezable gel cooling packs into the bottom of the cooler, and air can still circulate around and underneath the packs.
Step 9 Supplies - That Reminds Me...
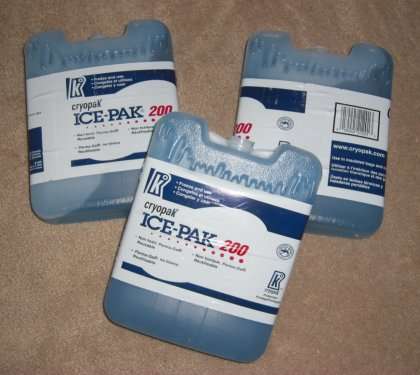
Your gonna need a bunch of these re-freezable gel Pack whatchmacallits.
I purchased the large ones, and started with three inside the cooler. After testing I may add more.
Your gonna need a bunch of these re-freezable gel Pack whatchmacallits.
I purchased the large ones, and started with three inside the cooler. After testing I may add more.
I have 6 of these all together so I can always switch out the old thawed ones and throw in some frozen cold ones from the freezer, and then refreeze the thawed ones.
You can use a bag of ice if you want, throw in a little water as well, or even add some cans of bottled water for later. It's all about experimenting and making progress!
www.pepsi.ca
You can use a bag of ice if you want, throw in a little water as well, or even add some cans of bottled water for later. It's all about experimenting and making progress!
www.pepsi.ca

Step 10 Anything Else?
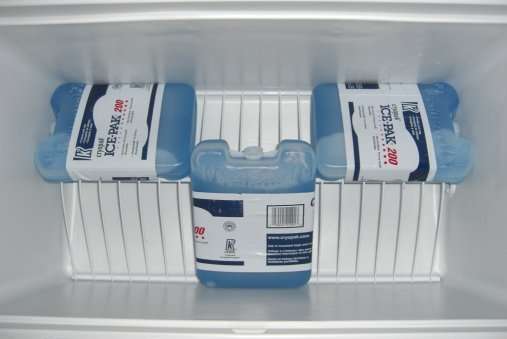
That's really all... You should have something that resembles (or closely resembles) something like what you see in this pic.
That's really all... You should have something that resembles (or closely resembles) something like what you see in this pic.
If your's does not look like this you've either screwed something up really badly, missed a step or two (or 6) or made changes to the original design (like I said before, an original design that is not mine) and have made this better and more productive (Props to you!)
Step 11 Ta Daaaaaaaa!

I have tried it out and I've enjoyed four major things:
1. I used it as a foot rest / Ottoman and it cooled me down pretty well
2. The handles & long cable make it easy to move around and use in a plenty of ways and in different locations
3. I had fun building it... it was pretty quick and easy
4. Cold drinks
1. I used it as a foot rest / Ottoman and it cooled me down pretty well
2. The handles & long cable make it easy to move around and use in a plenty of ways and in different locations
3. I had fun building it... it was pretty quick and easy
4. Cold drinks
Step 12 Updates - Future Plans
I think tomorrow I may head to Canadian Tire, and pick up one of those magnetic directional air flow floor vent scoop thingies!
Might also add more re-freezable gel packs to the interior of cooler (probably 4... will keep you posted!)
*these pics BORROWED from the internet
www.canadiantire.ca
I think tomorrow I may head to Canadian Tire, and pick up one of those magnetic directional air flow floor vent scoop thingies!
Might also add more re-freezable gel packs to the interior of cooler (probably 4... will keep you posted!)
*these pics BORROWED from the internet
www.canadiantire.ca
(Option #2) Simple Styrofoam Air Cooler

For anyone suffering from this heat we've been having, below you will find twp extremely inexpensive ways to build a highly efficient A/C for your bedroom or home office.
The A/C unit above works fine, but this one is the quickest, cheapest, and easiest to assemble BY FAR!! Also, I've posted another video below from someone who saw this video, built it, realized it worked extremely well, and created his own video after he made a few slight modifications to its design. Have fun, and stay cool!
The A/C unit above works fine, but this one is the quickest, cheapest, and easiest to assemble BY FAR!! Also, I've posted another video below from someone who saw this video, built it, realized it worked extremely well, and created his own video after he made a few slight modifications to its design. Have fun, and stay cool!
The video below, is a viewer's video response. Aside from the fact that he didn't turn his cell phone sideways to film, he made some nice modifications to the above Homemade Air Conditioner.
Check it out:
...his comment: "Ty so much i did it just da way u did it but a little adjustments to it n my wife Lv it Ty ;) got a short video of it too!"
Check it out:
...his comment: "Ty so much i did it just da way u did it but a little adjustments to it n my wife Lv it Ty ;) got a short video of it too!"


